How to make easy Christmas cake decorations

Whether youвҖҷre a first-time Christmas cake baker, or an old hand, ҙуПуҙ«ГҪ Food has teamed up with superstar baker Chris Murphy from to help you make your cake look fantastic with just some fondant, a rolling pin and a clean small paintbrush.
Getting started
Is there a difference between fondant and sugar paste?
Fondant icing and sugar paste are the same thing. Different brands use different names, with professional products usually called sugar paste while most supermarkets stock white or coloured fondant. You can colour your own fondant icing instead of buying separate packs, but you should only use gel or (in the case of black) powdered food colouring. A liquid colour will make the fondant too soft and sticky to mould.
How long can I store fondant figures?
Fondant figures will keep for up to a month if stored in a cool, dry place (not a steamy kitchen windowsill) away from light, dust and moisture. Do not store them in the fridge as they will form condensation, which will begin to soften and dissolve the sugar paste.
But I donвҖҷt like Christmas cakeвҖҰ
No worries, Chris has written a kidsвҖҷ Christmas sponge cake recipe that will hold up under the fondant icing snow. It freezes well (uniced), so you can still make it ahead of time.
How to make the Christmas fondant figures
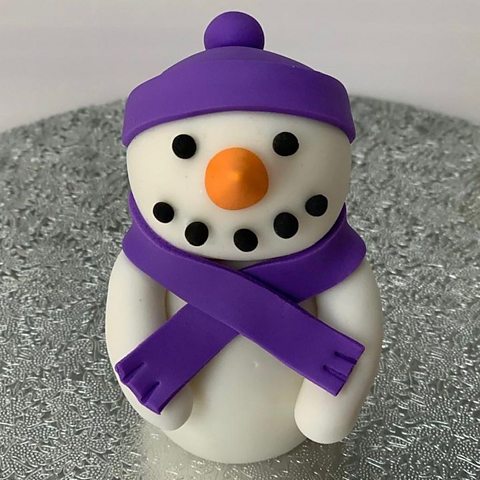
Snowman
You will need white, orange and black fondant, plus one other colour. WeвҖҷve used purple.
To form the body, roll a 60g ball of white fondant between your palms to create an egg shape. Roll a 35g ball of white fondant for the head. Rub a little water onto the top of the body until it becomes tacky, then place the head on top.
Roll purple paste (or your choice of colour) out to approximately 2mm thick. Cut out a circle the same width as the head of your snowman. Apply a little water to the top of the head and smooth this disk over to create a hat. With the remaining rolled paste, cut a rectangle to form the brim and another for the scarf. Score two little lines at the ends of the scarf and set aside. Roll a small ball for the bobble. Secure the brim and bobble with a brush of water.
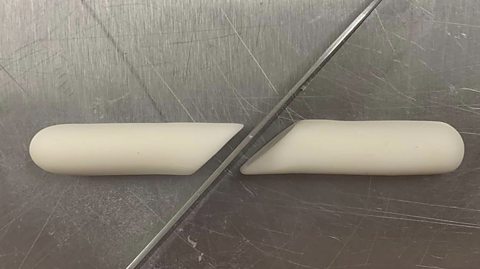
To make the arms, roll a 10g sausage from white fondant, ensuring the ends are smooth and rounded. Cut it in half diagonally through the middle. Attach the cut ends to the body with a little water at shoulder height. Add the scarf over the top of the shoulder join, securing it with a little water. Fashion the carrot nose from the orange paste and bead-sized вҖҳcoalвҖҷ from the black for a smile. Attach with a little water.
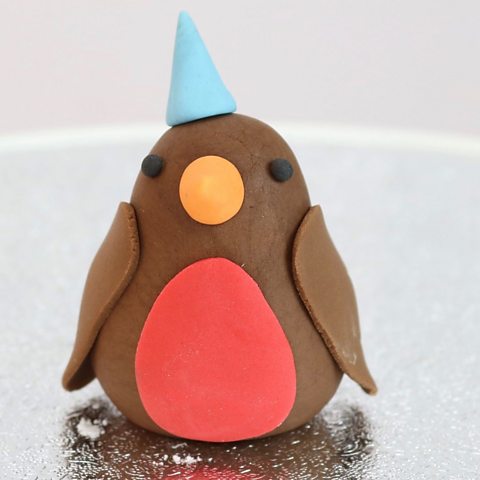
Robin
You will need brown, red, orange, blue and black fondant. Roll 60g of brown fondant between your palms to create an egg shape. Slightly pinch out a tail at the fatter end.
Roll a pea-sized amount of orange and blue fondant between two fingers to create cone shapes, flattening the bottom. Stick the orange cone (beak) on the opposite side and end to the tail with a little water. Stick the blue cone to the top as a hat.
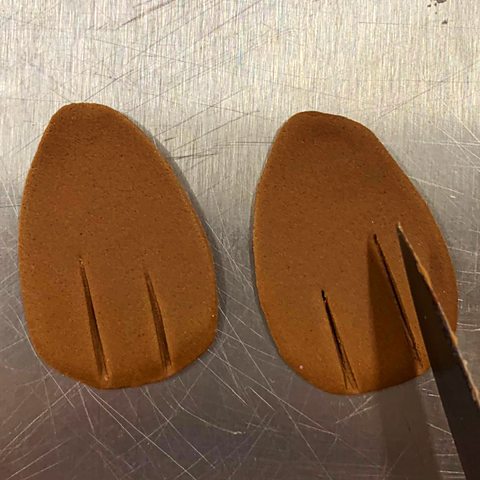
Make two tiny bead-sized balls from the black fondant to create eyes, then stick them in place. Roll the remaining brown and the red fondant out separately to 2mm-thick sheets. Cut out two brown and one red oval, roughly two-thirds the size of the birdвҖҷs body. Stick the red oval onto the tummy. Score two lines at the fat end of the brown ovals for wing tips, then stick these to the sides of the body.
Penguin
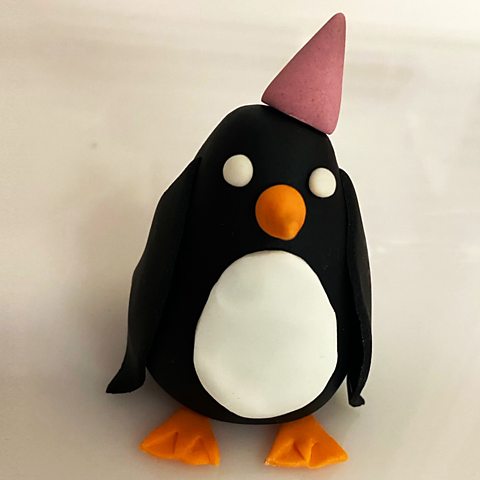
You will need black, white, pink and orange fondant.
Roll 60g of black fondant between your palms to create an egg shape. Slightly pinch out a tail at the fatter end.
Roll a pea-sized amount of orange and pink fondant between two fingers to create cone shapes, flattening the bottom. Stick the orange cone (beak) on the opposite side and end to the tail with a little water. Stick the pink cone to the head as a hat.
Make two tiny bead-sized balls from the white fondant to create eyes, then stick them in place. Roll the remaining black and white fondant out separately to 2mm-thick sheets. Cut a white oval, roughly two-thirds the size of the penguinвҖҷs body, and stick it onto the tummy. Cut out two pointed-leaf shapes the length of the egg shape from the black fondant and curl them up slightly at the ends to make the wings, then stick these to the sides of the body.
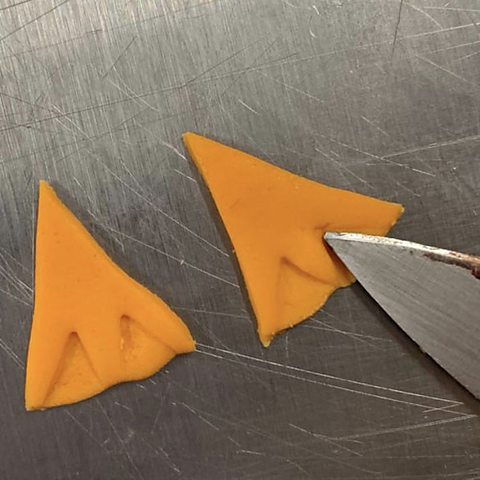
For the feet, cut two small triangles from the orange fondant and impress a couple of вҖҳtoesвҖҷ on each using the back of a knife. Stick them in place with water.
Christmas tree
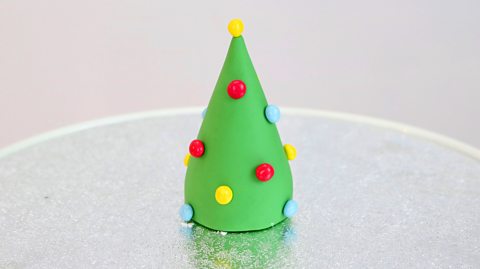
You will need green fondant and a mix of other bright colours.
Roll a cricket ball-sized lump of green fondant on a work surface until you have a chubby cone shape. Cut off the thicker end and upturn the cone to represent a tree. Apply tiny balls of the remaining fondant (or sweets) randomly using a little water to secure them in place. DonвҖҷt forget to place one on top to represent the star!
Covering the cake with fondant
You will need white fondant and blue food colouring to cover the cake.
To calculate how much fondant (and marzipan) you need to cover your cake, use our Christmas cake calculator. Add another 500g of white fondant for the snow effect.
Divide the total amount of fondant in half, and knead a dash of blue food colouring into one half to create an icy blue colour.
Roll the light blue fondant out onto a surface dusted with cornflour, to around 5mm thick, or until you have a sheet big enough to cover the cake. Trim off any excess using a sharp knife. With cornflour-dusted hands, carefully reach under the sheet and lift, letting your upturned forearms bear much of the weight.
Lower the blue icing onto the cake, matching the centre the best you can and laying it over like a table cloth. Working swiftly, carefully tease out the ruffles and creases in the fondant until you have a smooth finish. If any air bubbles have formed, remove them with a pin and smooth out the icing with the palm of your hand. Trim round the bottom edge of the cake, discarding the excess fondant. Wipe a little water on the top of your covered cake so it forms a tacky surface for the вҖҳsnowвҖҷ to adhere to.
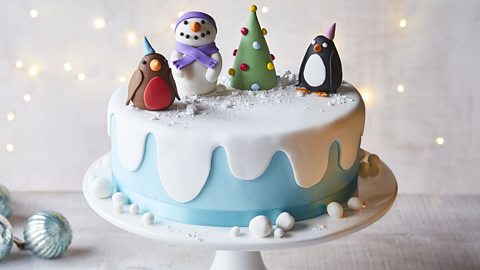

Adding the snow effect
Roll out the remaining white fondant to around 5mm thick. Using the cake tin you baked your cake in as a guide, cut out a slightly larger вҖҳsplatвҖҷ pattern and lay it on top of the blue fondant. Secure the overhang on the sides with a little water.
Arrange the figures however youвҖҷd like on the cake. When youвҖҷre happy with the arrangement, secure them in place with a little water. Sprinkle around any icing sugar you might have left and make little snowballs from white fondant scraps to dot about. For an extra-polished finish, wrap a ribbon around the base of the cake.
For a refresher on how to cover the cake with marzipan, see our article on how to ice a Christmas cake.
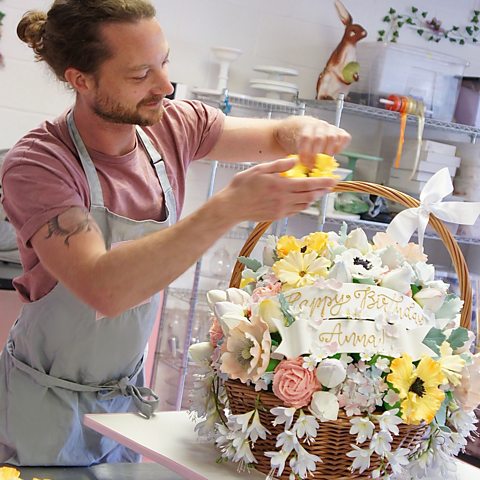
About Chris
Chris Murphy is a cake artist who works from his studio in south-east London. Chris studied fine art painting at Brighton University before turning his hand to the culinary arts. He set up Tuck Box Cakes in 2013, and now has clients both in the UK and abroadвҖҷ. Chris lives in Sydenham with his dog, Jelly.